Introduction
Adobe Acrobat Professional has a variety of tools the creator can use to make the files they create accessible. This tutorial will walk users with Adobe Acrobat Professional through the use of these features. Please note that Adobe Reader and Adobe Acrobat Standard cannot be used to make PDFs accessible; if you do not have Adobe Acrobat Pro, CommonLook PDF, or a similar piece of software, you cannot produce accessible PDFs.
In this tutorial, creation of accessible PDF documents in Adobe Acrobat will be covered through:
- Use of accessible source documents
- Automatic accessibility checker
- Alternative Text
- Reading Order
- Optical Character Recognition
Use Accessible Source Documents
PDFs are typically created by converting an existing document (such as a Word, PowerPoint, or Pages document). If the source document is not accessible (see our other tutorials), it will be extremely difficult to make the PDF accessible. Even if the source document is accessible, there will still be some work left to make the PDF accessible.
After creating the accessible source document:
Method 1: Using Microsoft Office to Convert to PDF
If following these steps, the next section, “Method 2: Using Acrobat Pro to Convert a File” should be skipped.
In Microsoft Office applications, open up the Acrobat tab on the ribbon at the top of the window. Then click on Preferences. (Note: If you do not see the Acrobat tab, you probably don't have Adobe Acrobat Professional installed. Please contact your department's IT staff.)

Ensure the Create Bookmarks, Add Links, and Enable Accessibility and Reflow with tagged Adobe PDF options are all enabled. Then click OK.

Then click the Create PDF button in the Acrobat toolbar. Choose a save location to convert the file into a PDF format.

Method 2: Using Acrobat Pro to Convert a File
If you have already completed “Method 1: Using Microsoft Office to Convert to PDF” this section should be skipped.
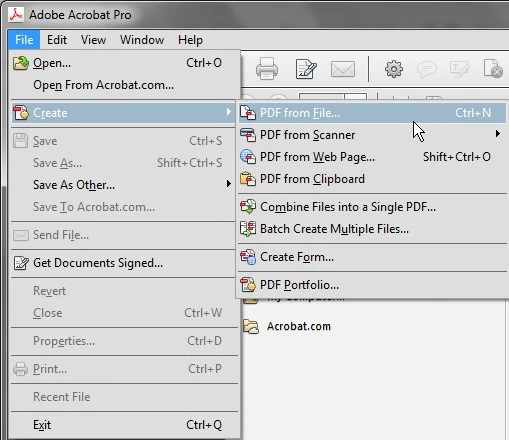
In Adobe Acrobat XI Pro, click the File drop down menu, then select Create, and then PDF from File.
Locate and select the source document and then click Open. This will convert the source document into a PDF file while maintaining the accessibility focused format and structure of the source document.
Check Accessibility
Adobe Acrobat has a tool that can assist in determining what parts of a document have accessibility errors. Please note that manual checks are necessary, regardless of what the tool reports. If you use this tool, make sure you use the Full Check, not the Quick Check.
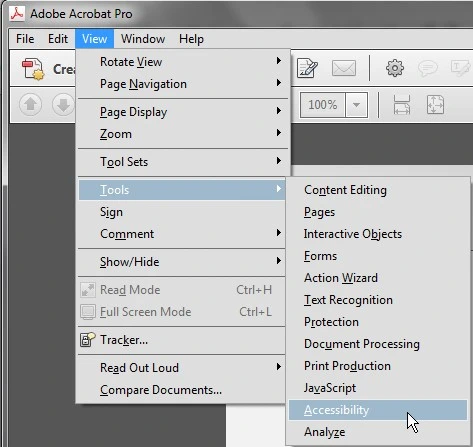
To run Adobe Acrobat’s automated accessibility evaluator, first click the View drop down menu, then Tools followed by Accessibility.

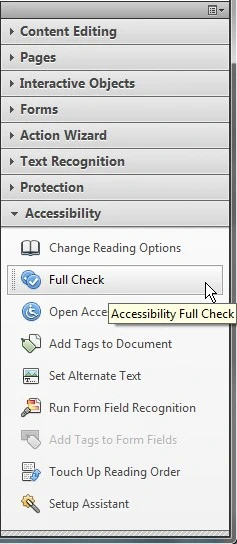
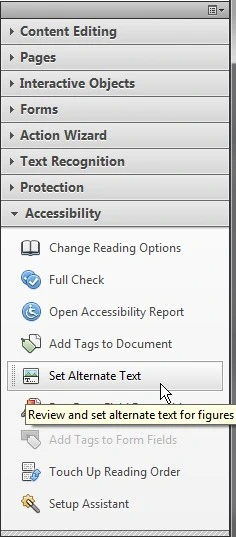
This will open up the Accessibility tool panel on the right side of Acrobat. In the Accessibility panel, select Full Check to perform a cursory evaluation of certain accessibility issues.
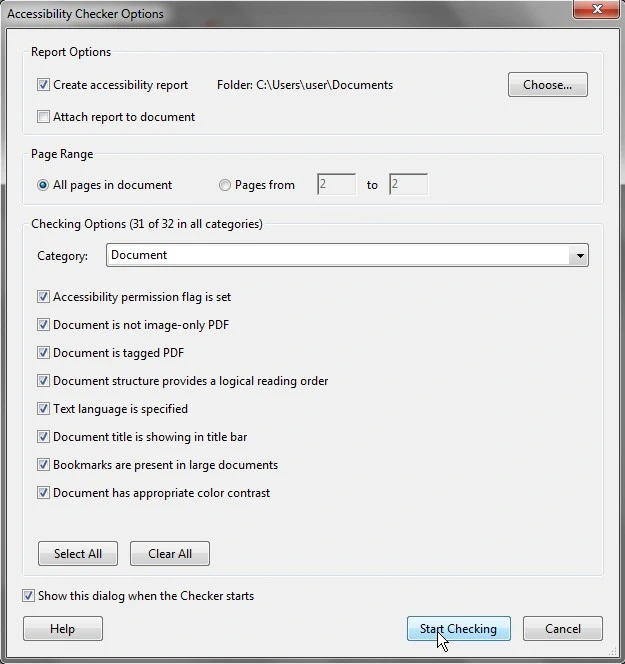
In the pop-up options menu, ensure all options are enabled to ensure all aspects are evaluated. Then click Start Checking to start the evaluation.
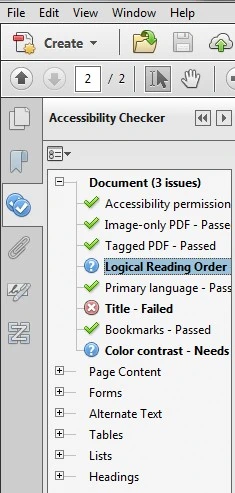
After the Full Check has run, a panel will open on the left, showing parts of the file that should be fixed to meet accessibility standards.
Although Acrobat’s Accessibility Checker evaluates numerous aspects of your file, it must be accompanied by a manual check for accessibility. No automated tool can determine whether a document or website is accessible; human judgment is always necessary.
Alternative Text
Alternative text for images, charts, graphs, and tables is vital to ensuring that users with visual impairments have access to information included in these visuals. This descriptive text should be limited to 120 characters for simple images, while the alternative text for graphs, tables, and complex images (such as detailed maps and diagrams) should give a brief summary of the included information. Alternative text should provide sufficient information so that users who are unable to see them are still able to understand what they convey. Images used for purely decorative purposes (i.e., those that do not provide any meaningful information) should not have alternative text. If the body of the document already contains a sufficiently detailed description in close proximity to the image, the alternative text can simply identify the image so that the reader knows when it is being referred to.
While there are no hard and fast rules for determining what alternative text should say (it depends on the image, its context, the intent of the author, etc.), one simple trick is to imagine describing the image to someone over the phone. The more important an image's content is, the more descriptive the alternative text should be.
For the MSU wordmark, "Michigan State University wordmark" would be appropriate for most documents. A graphic design document describing the introduction and use of different branding marks at MSU might require a more detailed description, if the specific formatting of the text would be important to the reader.
For charts and graphs, chart type (i.e., bar, pie, line, etc.), data type or axes, overall trends or patterns, and relevant data points should be described. For example, a simple chart might have the following alternative text: "Bar chart of number of traffic fatalities in Ingham county from 2008-2010. Fatalities have increased for the last two years. There were 121 fatalities in 2008, 157 in 2009, and 160 in 2010."
To add alternative text to images, click the View drop down menu, then Tools followed by Accessibility.
This will open up the Accessibility tool panel on the right hand side of Acrobat. In this panel, select Set Alternate Text.
Select OK in the Adobe Acrobat pop up box, and then name alt text accordingly in Set Alternative Text pop up box. Click the right arrow to set alt text on the next figure in your PDF file.
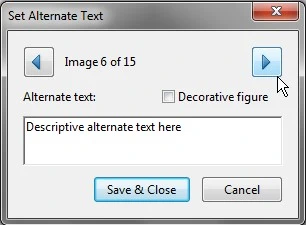
When all images have been assigned alternative text, select Save & Close.
Reading Order
To ensure that PDF contents are read in the correct order, proper headings and reading order must be manually set. Documents with images, columns, text boxes, tables, etc., will typically require more effort to make accessible.
Proper headings provide context and a way to navigate quickly for users of assistive technologies such as screen readers. Such technologies ignore text size and emphasis (bold, italic, underline) unless certain paragraph styles, such as Headings, are used.
Headings should be selected based on their hierarchy in the document. Start the page with a heading that describes overall document content (Title). Follow it with sub-headings (Heading 1) and sub sub-headings (Heading 2), etc.. Items of equal importance should be equal level headings, and heading levels should not be skipped (i.e., a Heading 3 can't be the first heading after Heading 1; Heading 2 can't be skipped).
In Adobe Acrobat, headings are indicated by "H1" through "H6" tags at the top-left corner of a text block in Reading Order mode. "P" (paragraph) tags are used to indicate normal, non-heading, text.
If proper heading structure was present in the source document, the PDF should have maintained this structure. Even so, manual verification of the PDF file’s heading structure should be performed.
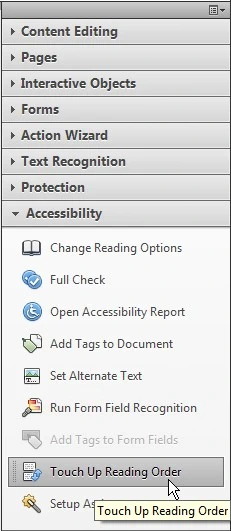
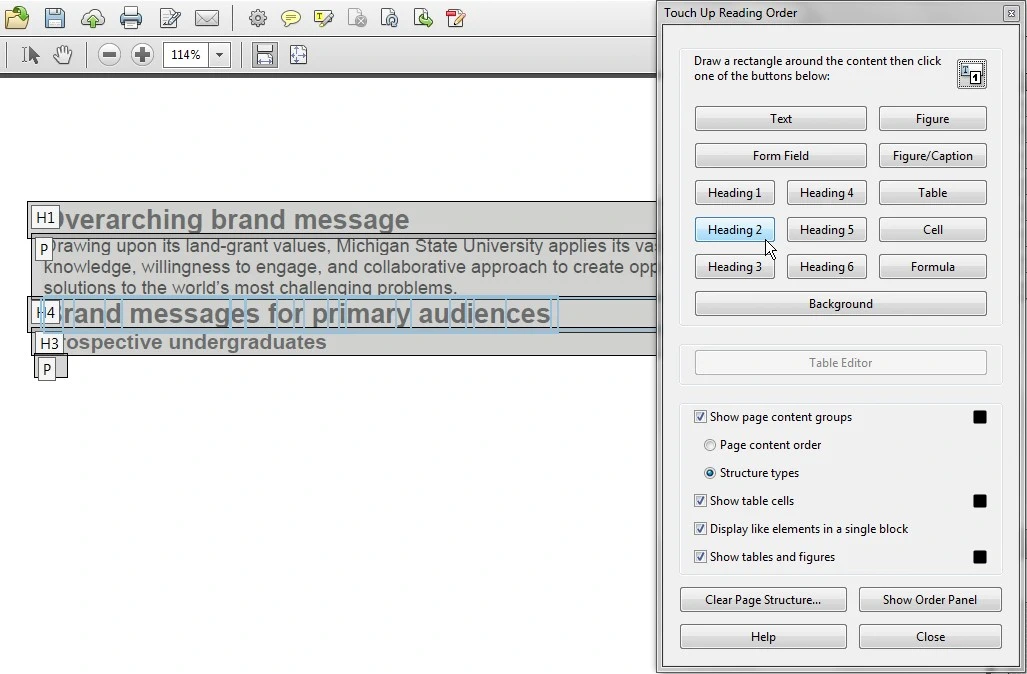
Click Touch up Reading Order in the Accessibility panel to manually set a reading order.
If a heading isn't appropriately tagged (i.e., the wrong heading level is used or text has a "P" instead of a heading tag), the tag will need to be changed.
Click and drag to draw a box around the heading in question, making sure the box is large enough that it completely covers every letter. Light blue boxes will appear around the words and letters selected; make sure all of the relevant text and no adjacent text is selected.
Click the heading level that you would like to assign. As “Brand messages for primary audiences” is a sub-heading beneath “Overarching brand message” (which is a heading 1), it should be designated as a heading 2.
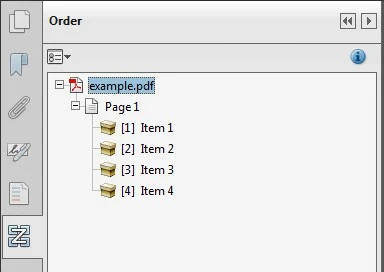
If you'd like to check and edit your reading order in order to ensure that screen readers will move logically through your document, open up the Order panel on the left side.
This will show you the reading order of your PDF file. If you wish to rearrange the reading order, just click and drag the item you would like to reorder to its proper location.
Optical Character Recognition
You can also create a PDF file by scanning a hard copy. This method will create a PDF file that is an image of the scan; the text will not be recognized and processed by screen readers. To create an accessible document from a scan, Acrobat’s Optical Character Recognition (OCR) tool must be used. This will convert the image of text from a scan to actual text.
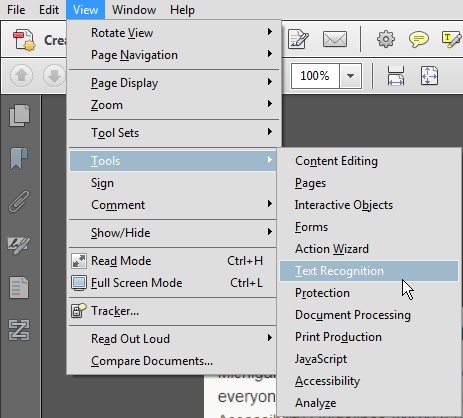
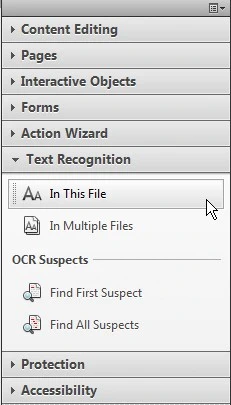
To run Acrobat’s OCR tool, first click the View drop down menu, then Tools followed by Text Recognition.
This opens up the Text Recognition tool panel on the right side of Acrobat. Select In this File to run a full OCR scan.
Ensure All Pages is selected and then click OK.
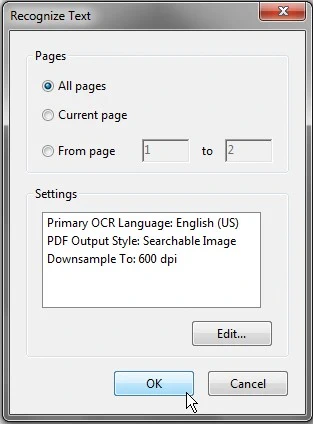
After a few minutes the OCR scan will complete, converting the scanned document into an accessible text format.